
Handknitted collectable meerkats - you name it, I'll knit it!
Showing posts with label pattern. Show all posts
Showing posts with label pattern. Show all posts
Tuesday, 11 June 2013
Chickenfish roadtest!
May I introduce Pickle and Makurro? They're busy roadtesting the chickenfish prototype, bless their little furry tails! (They're not my own kittens, they belong to my son and his fiancee)
As you may be able to see, chickenfish has had lots of love and attention and is nicely furry, the felt has softened nicely but no stuffing has escaped. I'd call that a successful roadtest!
If you want to make one for yourself, I've posted my pattern here. I haven't yet had time to make any to sell, but I promise it's on my to-do list!
Thursday, 6 June 2013
Chickenfish pattern

My first chickenfish is now undergoing roadtesting by two kittens belonging to my son and his fiancee and seems to be bearing up well, so I'm ready to share my pattern with you.

As I've made it in honour of FosterDadJohn and his kittencam, I'd like to ask you to only make it for personal use unless you make a donation to purrfectpals, the charity that John fosters for. If you are wondering what I'm talking about, it's time you watched the kittencam!
You'll need yellow felt for the body, red felt for the fins and tail, optional wadding to pad the fins and tail, black and white felt for the eyes, and toy filling. I used a carrier bag full. I used straight and zigzag machine stitching and handsewed some parts.
My felt was supplied by MinervaCrafts.com (thank you!) and you can read all about my struggles designing the pattern here and here. Details of materials used are at the bottom of the page.
Clicking on each picture will enlarge it. I've added measurements to help you to duplicate my efforts, but to be honest it isn't rocket science and your versions may well be better than mine! Additional details of how to sew your chickenfish are in my previous post here.


Fin: Make three the same. Fold each fin piece in half, sandwiching wadding between if you wish. Zigzag stitch around edges, add (optional) top stitched details. The folded edge will be sewn inside the body seam later.


Main body: Cut 6 "rainbow" shapes in yellow. Position and pin top fin halfway along outer edge of one body piece pointing down, then add the second body piece on top so that it will be inside when you sew the seam. That makes more sense in the pictures below. Sew outer and inner seams. I've allowed one centimetre (half an inch) as seam allowance.


The next photo show the body section turned the right way out, seam inside. Stuff with toy filling from each end. You *might* find sewing the tail on easier if you don't stuff yet, but it'll be very tricky stuffing the whole thing from just one open end. Judgement call!

The remaining two body pieces are sewn in the same way but the side fins are positioned nearer to the front (see photo below)

Pin chickenfish's rear ends together, folding a 1cm (half an inch) seam allowance at both ends and handstitch securely. Very securely! Kittenproof!
Tail: Place tail in position, matching the centre of the tail to the seam and handstitch securely.

Now add wadding (if used) and pin sides of tail together. Zigzag stitch as with fins, topstitch details (optional). You will probably need to finish by handsewing as the stuffing will prevent the machine getting up close!

Join front ends in same way, then position and pin top section and stitch in place. Take care to line up seams, it helps give chickenfish a face.
Eyes: Cut two white circles to size (mine are 1" across because that was the size of the nearest round thing!) and two smaller black circles. Stitch together, then in position.

HAIL!
You are welcome to use this pattern free of charge for your own kitties, but if you choose to sell your chickenfish please make a donation to help support FosterDadJohn and all the others who help PurrfectPals.
I'm not a professional pattern writer (can you tell?) so if this fails to make sense, please let me know and I'll correct it. You can find more detailed sewing information in my previous post here.
1 X 18" x 18" Squares Plain Acrylic Craft Felt Fabric red felt for the fins and tail
The wadding came from my stash but I think Minerva's lightest weight wadding would be fine.
Black and white felt also came from my stash, as did the toy filling. I used a carrier bag full, I don't know what weight of bag that would be, best to check before ordering! Minerva have filling and eyes if you prefer to use them.
I will be making A FEW chickenfish to sell, with a donation going to purrfectpals, so if you're interested please get in touch with me using the contact details at the top of the page or through my shops: Niftyknits at Etsy or Niftyknits at Folksy

Tuesday, 28 June 2011
Want to upcycle those little glass dessert pots?

Or maybe you just want an excuse to buy more? In case you haven't fallen for Gu desserts (really?), you could use any similar sized jar. They are about 3 inches across.
I love a bargain, so I've been indulging in some special offer desserts that come in little glass jars - but now I have a stash of little glass jars! I can't bring myself to throw them away and I've already seen quite a few in charity shops, so I decided it was time to think of a way to use them *drumroll* so I've got a couple of free patterns for you!
The jars are a perfect size for storing little bits and bobs, but have no lids. I've designed pin cushions which fit snuggly over the rim of the jar and keeping the contents safe at the same time. They don't take much yarn and are quick and easy to knit.
I've added flowers made on my flower loom, but you could use buttons, beads or shop-bought flowers - anything you fancy!
This pattern is for the pink/purple version. I like the contrasting colours, and it's a good stash-buster!
I used double-knit yarn and UK size 9 needles (3.75mm US size 5), but it's not too important. It's knitted in rows, and uses stocking stitch (1st row knit, 2nd row purl). All increasing is by knitting into front and back of same stitch, all decreasing is by knitting 2 together. You'll also need some filling - cotton wool would do if you don't have toy filling) and a short length of cord elastic.
Cast on 5 stitches in your main colour.
row 1: increase by knitting into front and back of next stitch (I'll call this "inc 1" in future), repeat to end = 10 stitches
row 2: purl
row 3: (K1, inc1) repeat to end = 15 stitches
row 4: purl
row 5: (K2, inc 1) repeat to end = 20 stitches
row 6: purl
row 7: (K3, inc 1) repeat to end = 25 stitches
row 8: purl
row 9: (K4, inc1) repeat to end = 30 stitches
row 10: purl
row 11: (K5, inc1) repeat to end = 35 stitches
row 12: purl
row 13: (K6, inc1) repeat to end = 40 stitches
row 14: purl
row 15: (K7, inc1) repeat to end = 45 stitches
row 16: purl
row 17: (K8, inc1) repeat to end = 50 stitches
Then work 3 rows stocking stitch. This will give you a height of about 4 inches including an inch and a half of jar. If you want it to be taller, work more rows.
Now decrease back to 10 stitches following the same structure:
row 21: (K8, K2 tog) to end = 45 stitches
row 22: purl
row 23: (K7, K2 tog) to end = 40 stitches
row 24: purl
row 25: (K6, K2 tog) to end = 35 stitches
row 26: purl
row 27: (K5, K2 tog) to end = 30 stitches
row 28: purl
row 29: (K4, K2 tog) to end = 25 stitches
row 30: purl
row 31: (K3, K2 tog) to end = 20 stitches
row 32: purl
row 33: (K2, K2 tog) to end = 15 stitches
row 34: purl
row 35: (K1, K2 tog) to end = 10 stitches

Cut yarn leaving long end, thread on sewing needle and pull through last 10 stitches. Sew row ends together but stuff before fastening seam completely.

Take a few last stitches back and forth between top and bottom to draw into a slight doughnut shape, this helps to bulge out the "equator" and sit more snugly.

Now for the bottom strip.
Cast on 50 stitches (in contrasting colour if you wish)
row 1: knit
row 2: purl
row 3: knit
row 4: purl
row 5: purl *this is not a mistake! it will give a useful purl ridge for threading the elastic.
row 6: purl
row 7: knit
row 8: purl
cast off, leave a long end.
Fold in half at the purl ridge and stitch to form one double strip.

Now measure a length of elastic long enough to go round the rim of the jar and enough over to knot securely - around 12 inches should do it. Using a needle, thread the elastic in and out of the purl ridge (I said it'd be useful!).

Place on jar and knot to fit, then stitch the two ends of the strip together. You can tuck the knotted end of the elastic inside at this point if you remember!
With the other edge of the elasticated strip pointing up from the rim, seat the other section on top and stitch in place. This is what it looks like without the jar from underneath (note it's the other colour variation) - actually, it works well as a pincushion without the jar, but that rather defeats the point of my plan to upcycle them!

Finally, embellish and make beautiful and fill your jar with bits and bobs!

More free patterns (including the green cactus shown here) available on my patterns page *click here*
Can't knit? Buy one from my folksy shop
Friday, 16 April 2010
Niftyknits in Yarn Forward magazine!
I was browsing magazines while Mr Nifty bought a paper - Yarn Forward caught my eye.

I looked inside...

I know those sheep!

Yarn Forward commissioned the pattern a while ago, the very first NiftyKnits pattern to be published - doesn't it look fab? It's the June issue, available now (as I can prove!) If you can't wait, I have lambs available from my shops on Etsy, Folksy and Zibbet.
Friday, 17 April 2009
Let's meet...GocksFrocks
GocksFrocks, owned by Kristen, sells handmade clothing & accessories for kids, women, and the home.
But what about the woman herself? Let's find out...
Cats or dogs?
Dogs - cats too if I were not allergic
Star Wars or Star Trek?
star wars
Fruit or chocolate?
fruit!
Favourite colour?
purple
Favourite meal?
breakfast
City break or weekend in the country?
both please!
Soaps or documentaries?
documentaries
Bath or shower?
shower - only because our tub is too tiny
Now we’ve got you warmed up…
What brought you to Etsy? Tell us about your shop. Do you sell anywhere else?
A friend first told me about etsy & when I checked it out I was smitten - love the creativity here as well as the ease of listing my items. I sell on ebay from time to time and also do a couple of local art shows.
What’s the favourite item you’ve made so far?
hard to pick just one...I think whatever my current project is tends to be my favorite - but I do LOVE working with felted wool anytime
What has been the most useful lesson you’ve learnt so far?
keep listing & adding to your shop
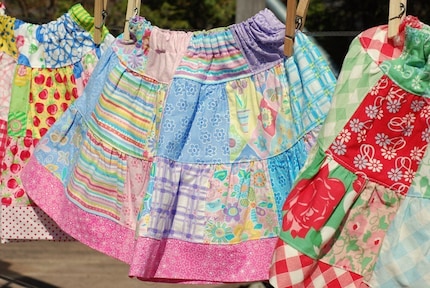
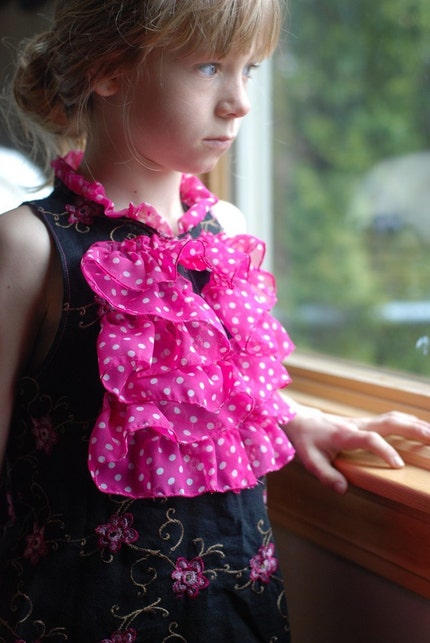
try to capture your items in an original and eye catching manner - my clothesline shots became my signature photos last winter when it was too cold for my daughter to model outside!
If you could start again, is there anything you’d do differently?
be more organized with the business side of it all - receipts, paperwork etc....
also...win the lottery so I could build an amazing studio space full of natural light over our garage!
How do you see your store developing?
branching out with my offerings - I recently added a bit of home dec (log cabin pillow slipcovers) as well as skirts for women.
What have you been doing today that I’ve interrupted?
drinking coffee and catching up on my blog reading
What’s your top marketing tip for today?
try some social networking(twitter, facebook, blog) - spread the love you have for your art to all that you know
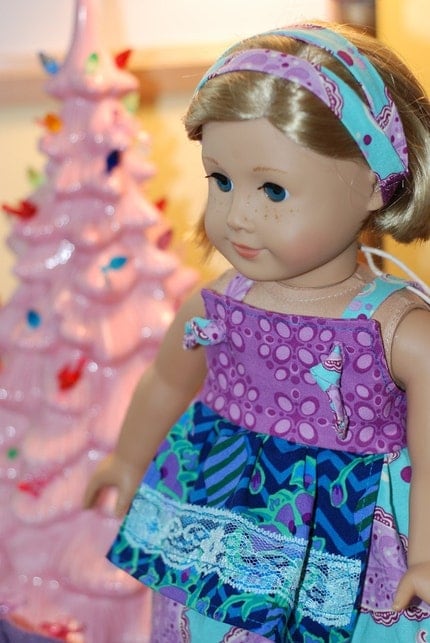
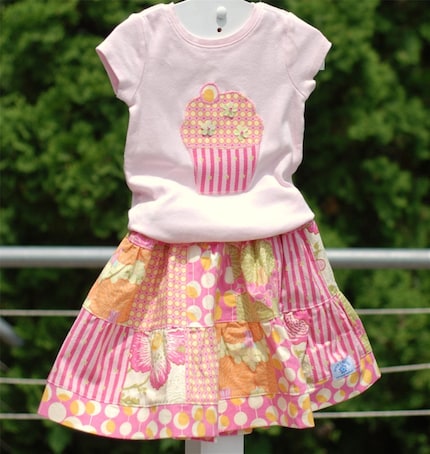
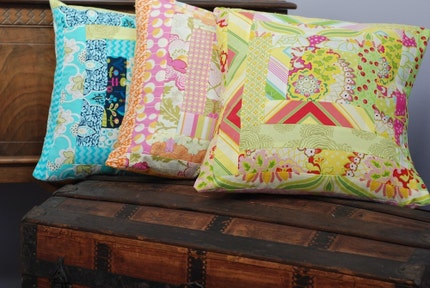
Wow! I don't know about you, but I'm staggered by the array of bright colours and patterns - absolutely gorgeous! for more, check out GocksFrocks and Kristen's other store BettysCloset.etsy.com where she sells some of the amazing fabrics she uses in her designs. You can also read more on her blog
But what about the woman herself? Let's find out...
Cats or dogs?
Dogs - cats too if I were not allergic
Star Wars or Star Trek?
star wars
Fruit or chocolate?
fruit!
Favourite colour?
purple
Favourite meal?
breakfast
City break or weekend in the country?
both please!
Soaps or documentaries?
documentaries
Bath or shower?
shower - only because our tub is too tiny
Now we’ve got you warmed up…
What brought you to Etsy? Tell us about your shop. Do you sell anywhere else?
A friend first told me about etsy & when I checked it out I was smitten - love the creativity here as well as the ease of listing my items. I sell on ebay from time to time and also do a couple of local art shows.
What’s the favourite item you’ve made so far?
hard to pick just one...I think whatever my current project is tends to be my favorite - but I do LOVE working with felted wool anytime
What has been the most useful lesson you’ve learnt so far?
keep listing & adding to your shop
try to capture your items in an original and eye catching manner - my clothesline shots became my signature photos last winter when it was too cold for my daughter to model outside!
If you could start again, is there anything you’d do differently?
be more organized with the business side of it all - receipts, paperwork etc....
also...win the lottery so I could build an amazing studio space full of natural light over our garage!
How do you see your store developing?
branching out with my offerings - I recently added a bit of home dec (log cabin pillow slipcovers) as well as skirts for women.
What have you been doing today that I’ve interrupted?
drinking coffee and catching up on my blog reading
What’s your top marketing tip for today?
try some social networking(twitter, facebook, blog) - spread the love you have for your art to all that you know
Wow! I don't know about you, but I'm staggered by the array of bright colours and patterns - absolutely gorgeous! for more, check out GocksFrocks and Kristen's other store BettysCloset.etsy.com where she sells some of the amazing fabrics she uses in her designs. You can also read more on her blog
Sunday, 15 March 2009
Selling my knitting patterns?

Several people have asked me recently if I'd sell my patterns. So far, I'm saying no for a couple of reasons.
The first is that I am very proud of my creations! It took me quite a long time to realise that making my own patterns up was even possible, let alone be brave enough to start.

Yesterday, midway through making a second corgi (which needed to match the first to some extent), I lost my pattern. Panic ensued - my fellow members of Etteam will agree that I was just a tiny bit cross!
When I eventually found it (well, OK, give him his due - Mr NiftyKnits found it, I was so cross I'd stopped looking) I thought I'd scan it in case I lost it again.

Having scanned it, I thought if I showed you just how professionally written out my patterns are, you just might guess another reason I don't put them up for sale...LOL it all makes perfect sense to me!

So anyway...anyone still want to buy a pattern?
Subscribe to:
Comments (Atom)